This isn’t a “here’s how to do it perfectly” guide. It’s more of a “here’s what I found out when I actually tried it” one — which I think is more useful.
My situation: The time of the experiment, I was used to live somewhere with a communal garden. No permanent fixtures allowed outside, no poles, nothing you’d need to anchor a satellite dish properly. So when I got Starlink, I couldn’t just stick the dish in the garden like most people do. I needed another option, and the window was the most obvious candidate.
I want to be clear — this was an experiment. I wasn’t relying on this setup as my main internet connection. I wanted to know whether a window mount was even viable, because a lot of people in flats or rented properties are asking exactly that question. So I set it up, ran it for a while, and paid attention to what happened.
Here’s what I found.
The setup
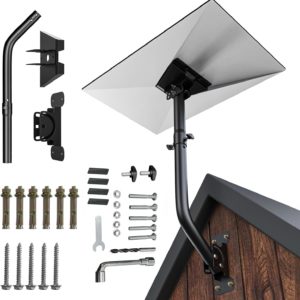
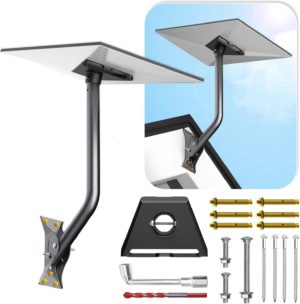
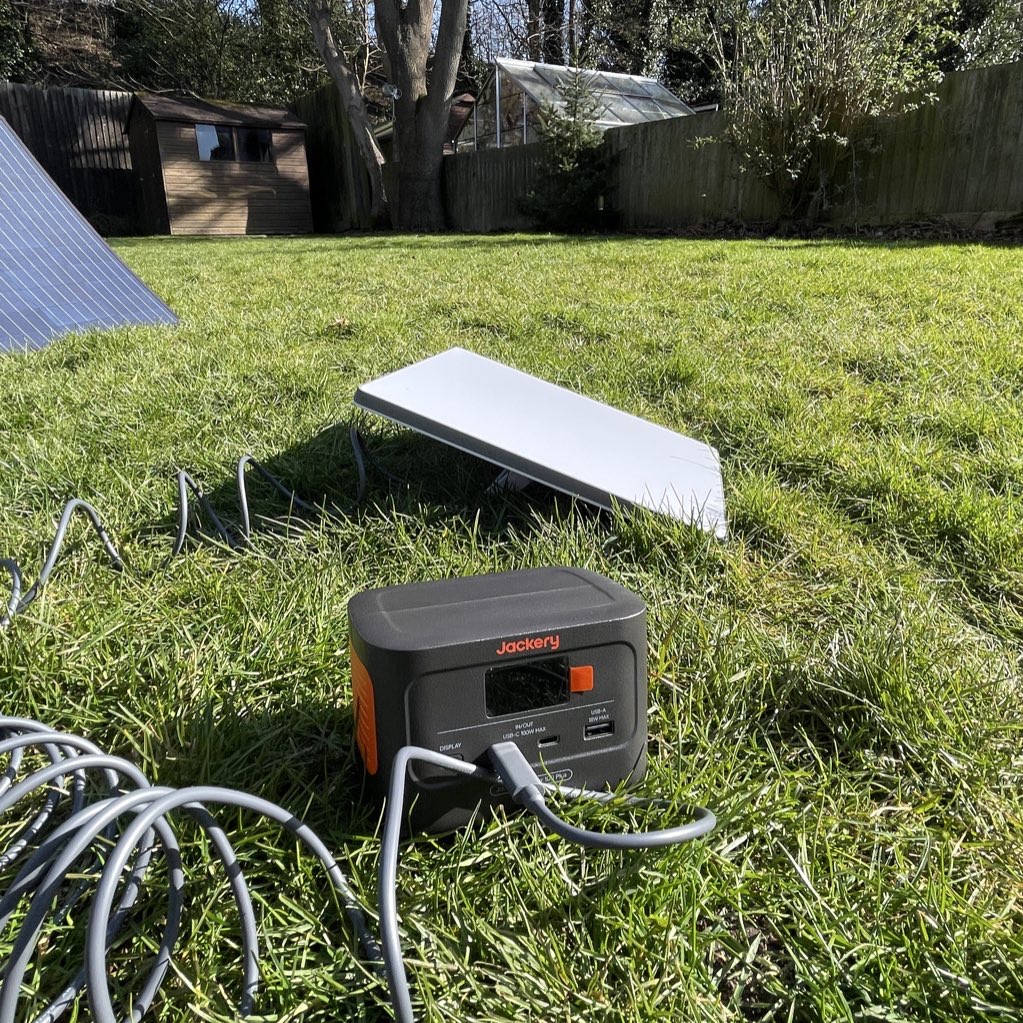
For the physical mount, I used the Starlink pipe adapter — the accessory that connects the dish to a standard pole — along with a suction cup window mount. The suction cups held absolutely fine throughout the test, which was one thing I was quietly worried about. No slipping, no drama there.
The dish sat outside the window on a pole, which is the right approach. If you try to mount through the glass or right against the frame, you’re immediately cutting off half the sky — which I’ll come to in a second.

Getting the cable inside without drilling was its own puzzle, but manageable. The Starlink cable is slim enough to route through a slightly open window with some foam to seal the gap around it.
So physically, the setup worked. That part wasn’t the problem.
The obstruction problem — and why it matters more than anything else
Here’s what actually hurt the performance: the dish was too close to the wall.
The model I was testing is the Starlink Gen 2 Actuated dish — the version with a built-in motor that automatically adjusts its angle to track the optimal direction. This is different from the newer Gen 3, which is more like a traditional fixed dish where you manually point it in one direction and leave it there.
With the Gen 2 Actuated, the dish isn’t just pointing at one fixed spot in the sky. It’s constantly moving to track a constellation of satellites across a wide arc overhead. For that to work well, it needs a large unobstructed view of the sky in multiple directions — not just the narrow strip directly in front of it at any given moment.
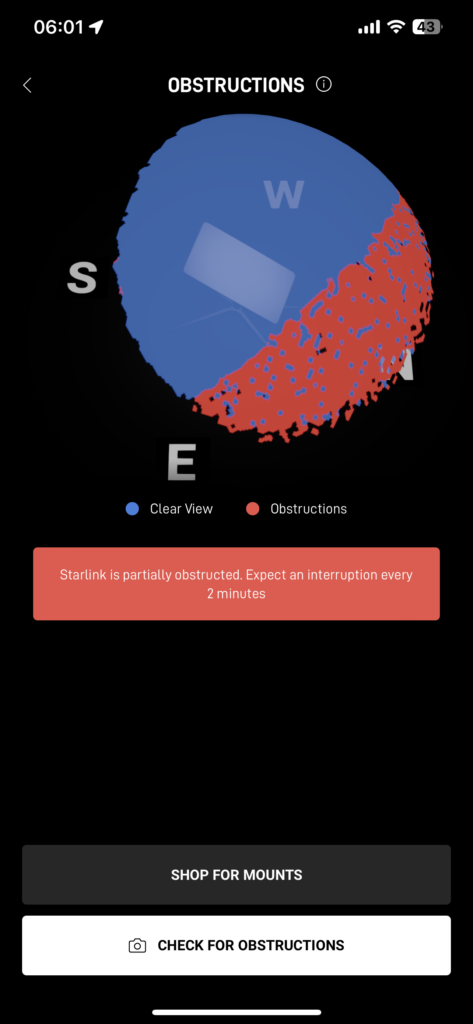
That’s what makes wall proximity such a problem with this particular model. When the dish is right up against the wall of a building, even mounted outside the window, the wall blocks a significant chunk of that arc. In my case, it was cutting off roughly half the visible sky. The Starlink app’s obstruction checker made this very visible — there was a big dead zone right where the wall was.

If you’re using the Gen 3 fixed dish, the obstruction calculation is slightly different — you’re choosing one direction and optimising for that, so a wall behind the dish matters less than with the actuated model. But you still need a clear view in the direction you’re pointing it, and window frames and nearby buildings will still cause problems.
The result was noticeably worse than a proper outdoor mount. More dropouts, more “searching” moments, worse average speeds. It wasn’t unusable, but it was clearly compromised.
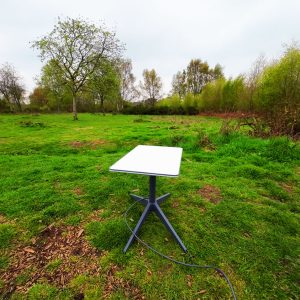
Worth being specific about my setup here: I was using a ground floor window on a terrace house. That’s about as difficult a starting position as you can have — the roof line and the wall above are both cutting into the sky view, and you’ve got no elevation advantage whatsoever.
If you’re on the first floor, the picture could be meaningfully different. A window higher up the building already clears more of the surrounding obstructions, and if your pole is long enough to get the dish above the roof edge, you’re suddenly in much better territory. That’s not a guaranteed fix, but the geometry works in your favour in a way that a ground floor window simply can’t.
The fix for my specific situation would be a longer pole — something that extends the dish far enough from the wall to clear the obstruction zone. But at some point, a pole that long becomes its own problem, both for stability and for the practicalities of routing the cable back inside. On the ground floor, you’d need an impractically long pole to get above the roofline anyway. A first floor window changes that equation considerably.
What the Starlink app tells you (and why you should check it first)
Before you buy any hardware, open the Starlink app and use the obstruction checker at the window you’re considering. Hold your phone up and let it scan.
It’ll show you a sky map with any obstructions highlighted. If you see a big blocked zone from the wall, the frame, or nearby buildings — that’s exactly what your connection will look like. The app is genuinely useful here and it’ll save you time and money if the answer is “this window just isn’t going to work well.”
So is it worth doing?
Honestly — for a permanent home connection, probably not, unless you can get the dish well clear of any walls and obstructions. The closer you are to a building, the worse it’ll be, and most window setups inherently put the dish near a wall.
Where I think it does make sense is for temporary or travel use. If you’re taking Starlink somewhere for a few days — a holiday cottage, a van, somewhere you don’t have a permanent outdoor spot — a window mount is a perfectly reasonable solution. You’re not expecting it to be perfect, you just need it to work adequately for a short stint. For that, it’s fine.
For renters in a similar situation to mine, with a communal garden and no permanent outdoor option, I’d keep looking. A balcony railing mount, a chimney mount, or even a temporary ground tripod in a private corner of the garden are all going to outperform a window setup. The wall obstruction problem is hard to solve without either a very long pole or a very fortunate window position.
One thing I want to test next: Starlink Mini
One variable I didn’t have in this experiment was dish size. The standard Starlink dish is fairly large and heavy, which makes the whole weight and balance situation on a window mount more demanding — both on the suction cups and on how far the pole needs to extend to keep it clear of the wall.
The Starlink Mini is a much more compact and lighter unit, and I think that could change the equation meaningfully for window mounting. A lighter dish puts less strain on the mount, and the smaller footprint might make it easier to position without the wall eating into its sky view as badly.
I’m planning to test this properly over the next month or two and write it up. If you’re specifically looking at window mounting as a solution, it might be worth holding off on conclusions until I’ve had a chance to run that comparison. I’ll link it here once it’s up.
The bottom line
The suction cup mount worked fine. The physical setup is straightforward. But performance was noticeably worse than a proper outdoor installation, and the main reason was wall obstruction limiting the dish’s sky view.
If you’re testing it out of curiosity, or you need a temporary solution for travel — it’s worth knowing how to do it. If you’re hoping it’ll replace a proper outdoor mount for everyday use, my experience says it won’t get you there.
Check the obstruction map in the app first. That’ll tell you more than anything else whether your specific window has a chance.